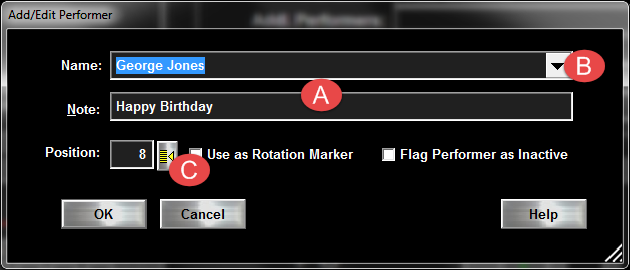
Adding Performers to Rotation
[Previous] [Main] [Next]

·Click "Add" from the Performers Rotation Function Buttons (L) (Figure - Main Screen)  

A New Dialog will appear...
addperformer.png
(Figure - New Performer Dialog)


1. Enter the New Performer's Name (A) or utilize the convenient Drop-Down selection box listing all past performers! (B).
2. Enter an optional Note.
3. The next available Spot in the Rotation is automatically provided, you may override this by simply editing this field to reflect the desired position. (C)
4. Select "Use as Rotation Marker" if you wish to utilize this Performer as the Start of the Rotation. (By default, the FIRST Performer added to a Rotation will automatically receive this flag.)
5. Designate Performer as Inactive. The Performer will NOT appear in the Visual Rotation Scroller (VRS) until Activated. (NOTE: Once added, you may toggle any selected Performer Active/Inactive by clicking the "A/I" button found on the Main Host Dialog (M) )
6. Click OK.


Repeat for each additional Performer.